Single Spider-Ti®
Instructions
Single Spider-Ti®
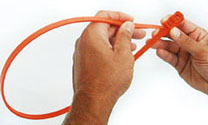
securing methods: Create a figure "8" configuration
with two individual loops for hands as shown.
1. Grasp
the Spider-Ti® head end so that the Spider logo is
visible (top side facing up).
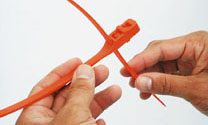
2. Insert the tail end through the dry (non-grabbing) socket
marked #1. (Note: The side with the multiple teeth should
be on the inside of the loop with the ruler showing on the outside of
the loop.)
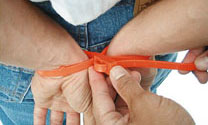
3. Place the loop around the suspect's wrist and tighten securely
by pulling on the tail end.
4. Make a second loop by creating a figure 8 with the remaining
length of the Spider-Ti® and inserting the tail end
through the locking socket on the head marked #2. Place the suspect's
other wrist through the new loop and tighten securely by pulling the
tail end.
5. For extra security, loop the tail end through the last
locking socket marked #3. (This 3rd loop can also be used to secure
the suspect to a fixed spot such as a rail, door handle, stretcher rail,
etc. CAUTION, when doing this, if suspect struggles, it may cause
Spider-Ti® to over tighten and restrict blood circulation.)
|


